Real Estate photography is an art. There is so much more to it than just pointing and shooting. Sometimes it takes layering many images, and a lot of post-processing to achieve the desired effect. Making sure that you choose a photographer that is skilled in this art is important as to avoid hiring a second photographer and to be able to attract more views. Here are some of the common mistakes we have seen in home photography and some of our favorite staging tips.
Common Real Estate Photography Mistakes
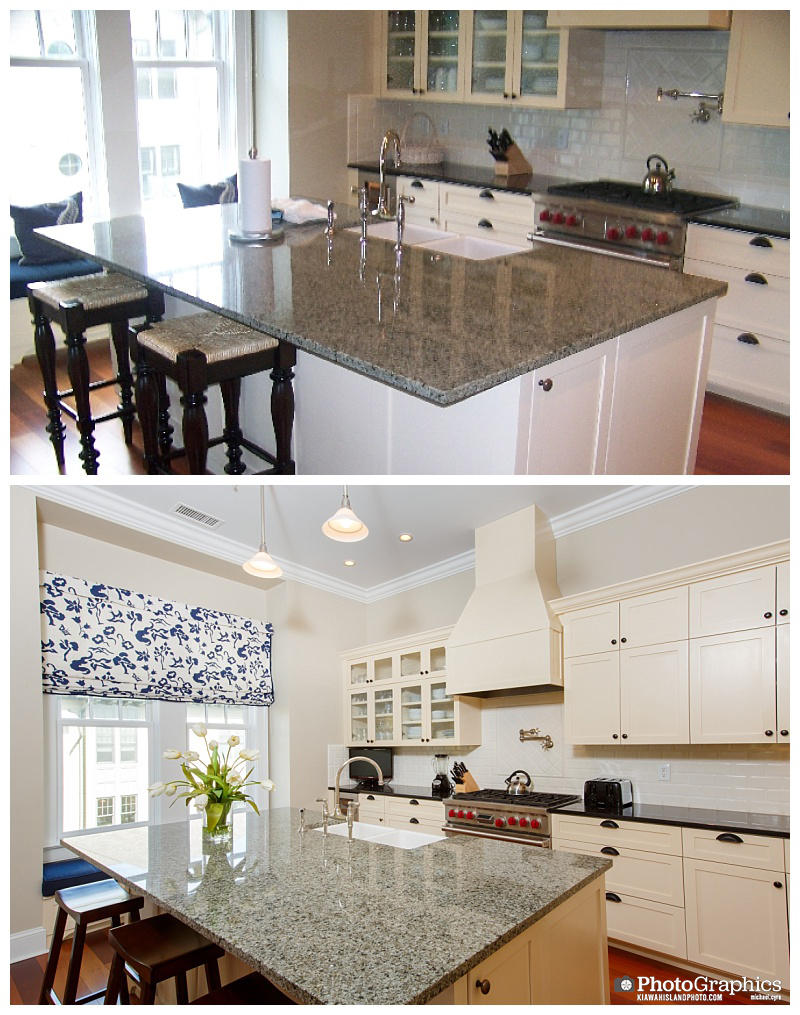
1. Keystone effect
This makes tall buildings, walls and homes appear as if they are leaning backwards. It’s important that vertical walls stay vertical while photographing a home or rental property. As you can see in the following pictures, the back wall in the first photo appears as if it is leaning, while the second photo is perfectly upright.
Staging tip: Out with the old. Sometimes, you can add accents and little touches to what is already existing. Sometimes, you just need to change it up. If you have an old, beat up couch, consider replacing it with something new, fresh and clean.

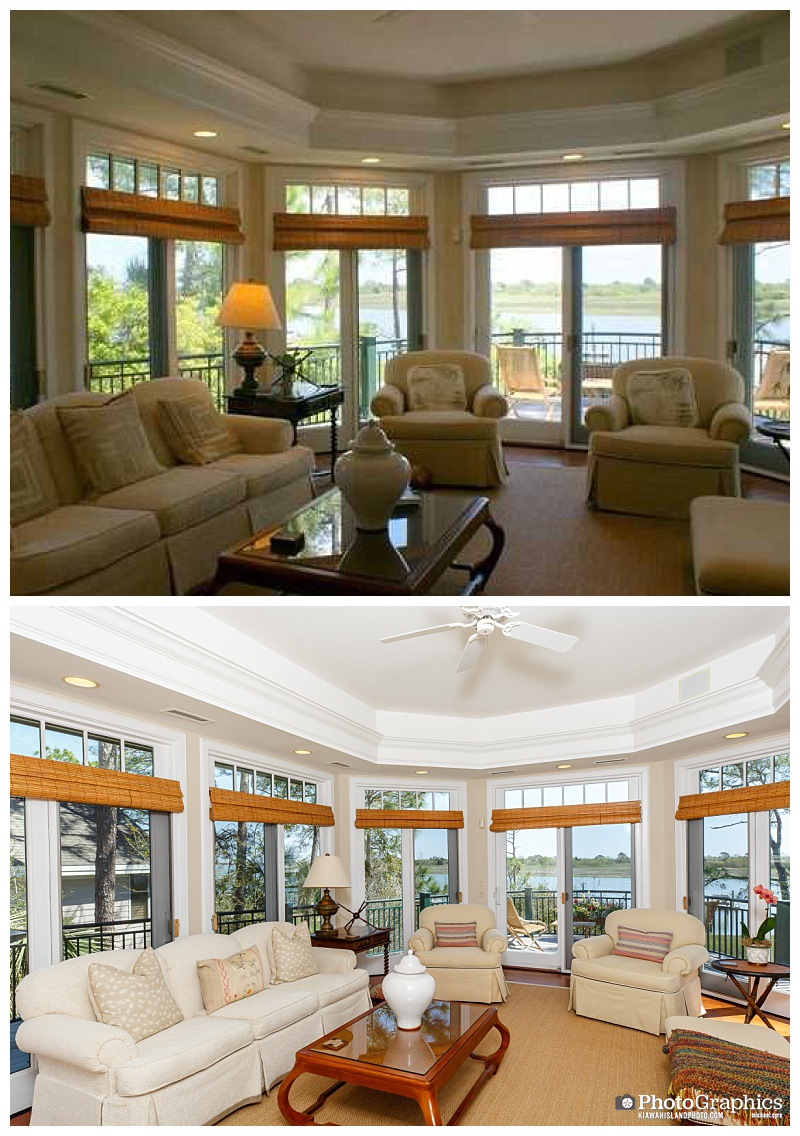
2. White out windows
You should be able to see out the windows in a photographed room, which is easier said than done. A lot goes into getting that perfect shot, so make sure to hire someone you trust. As you can see, it makes a huge difference in the finished product of a photo.
Staging tip: Make a space feel like home. Add touches to the space to make it look livable, and so they could imagine themselves being there. In a kitchen you can add a blender, microwave, flowers, etc. After all, home is where the heart is.

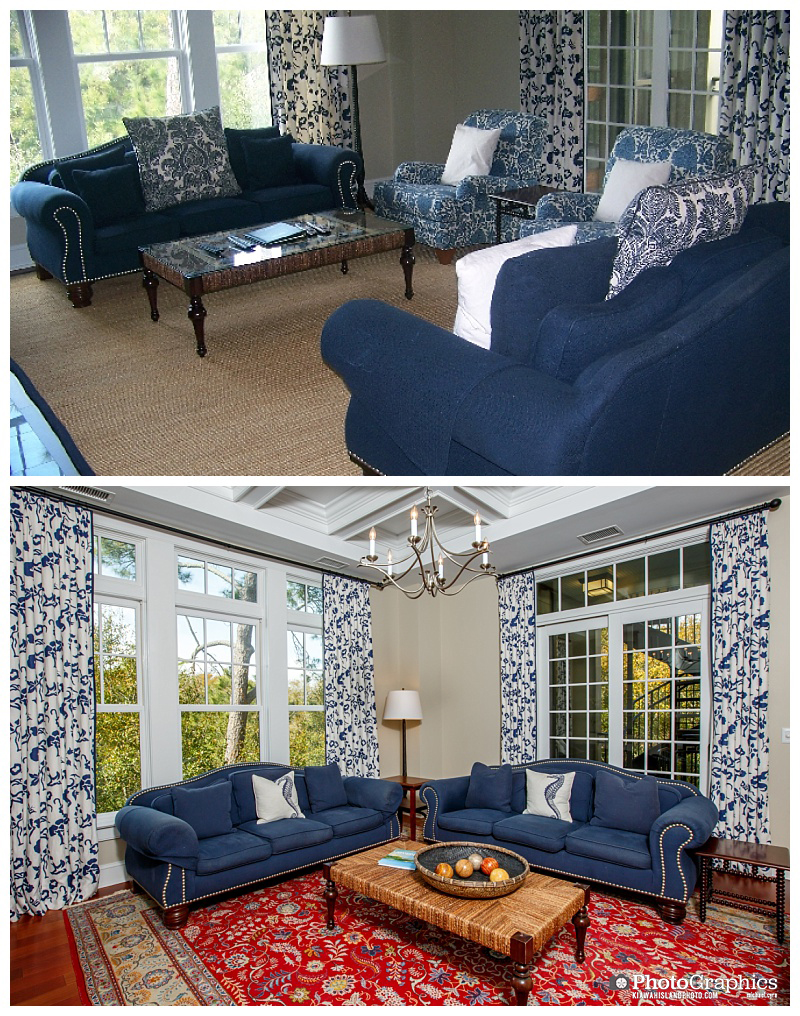
3. Bad lighting
Lighting inside a home can make your photographs appear yellow in color as seen above, or dull and dark as seen below. We prefer natural light over artificial. That isn’t always possible in homes, however it is possible to make your room appear as if it is flooded with light by bringing in speed lights and studio strobes to ensure balanced light throughout the home and then following up with post-processing.
Staging tip: Add fun accents. Sometimes you just need to change out the pillows, add a throw blanket and flowers to liven up a space.
4. Bad angles
A room can completely transform simply by how you photograph a space. Spaces can seem small and crammed simply by how it is photographed. Make a small room appear larger by choosing the right angles, avoid photographing the back of a couch when necessary and photograph from floor to ceiling.
Staging tip: Move things around. Changing up the space can also make it appear larger. In the photo below, you can see that by moving the coach to the wall and shooting at a wider angle completely opened up the room.

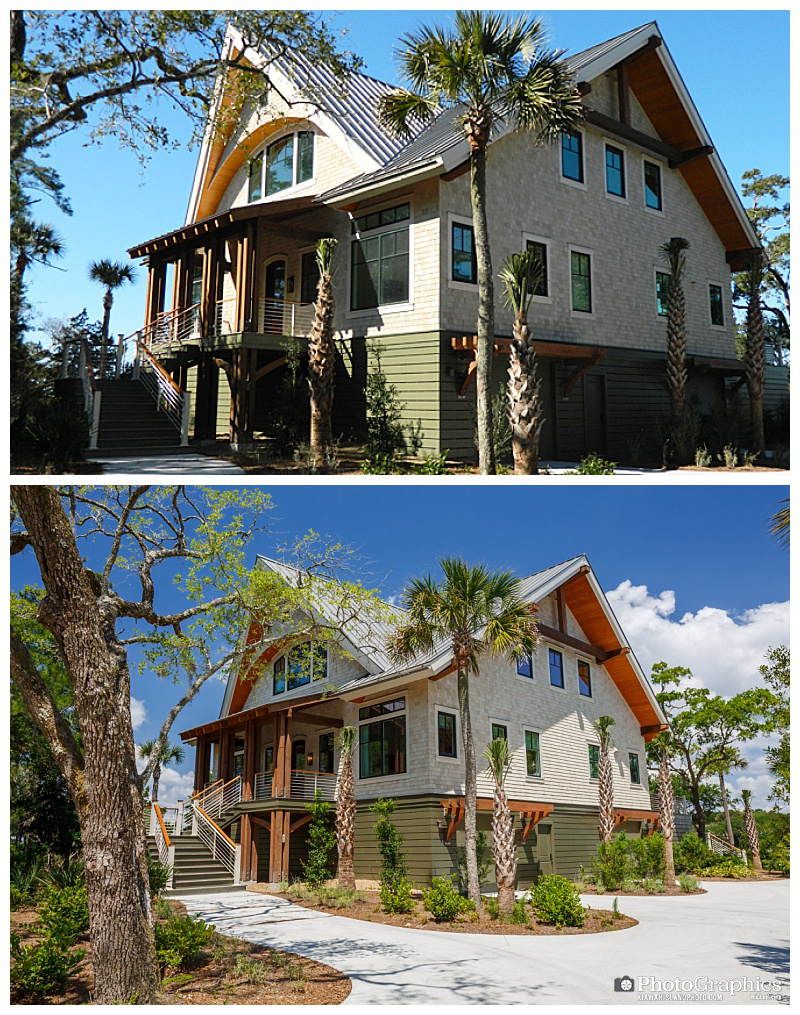
Exterior Home Photography:
A lot of the same rules apply to exterior photography as they do to indoor.
- It’s important to choose the right angles, dimension, distance, time of day and more.
- For exterior home photography, sunny days with some cloud coverage are ideal. Watch the weather before a session, and if necessary, change the session so that you can achieve the best possible results. Days that are very overcast, rainy and dull are usually days you might want to try to reschedule.
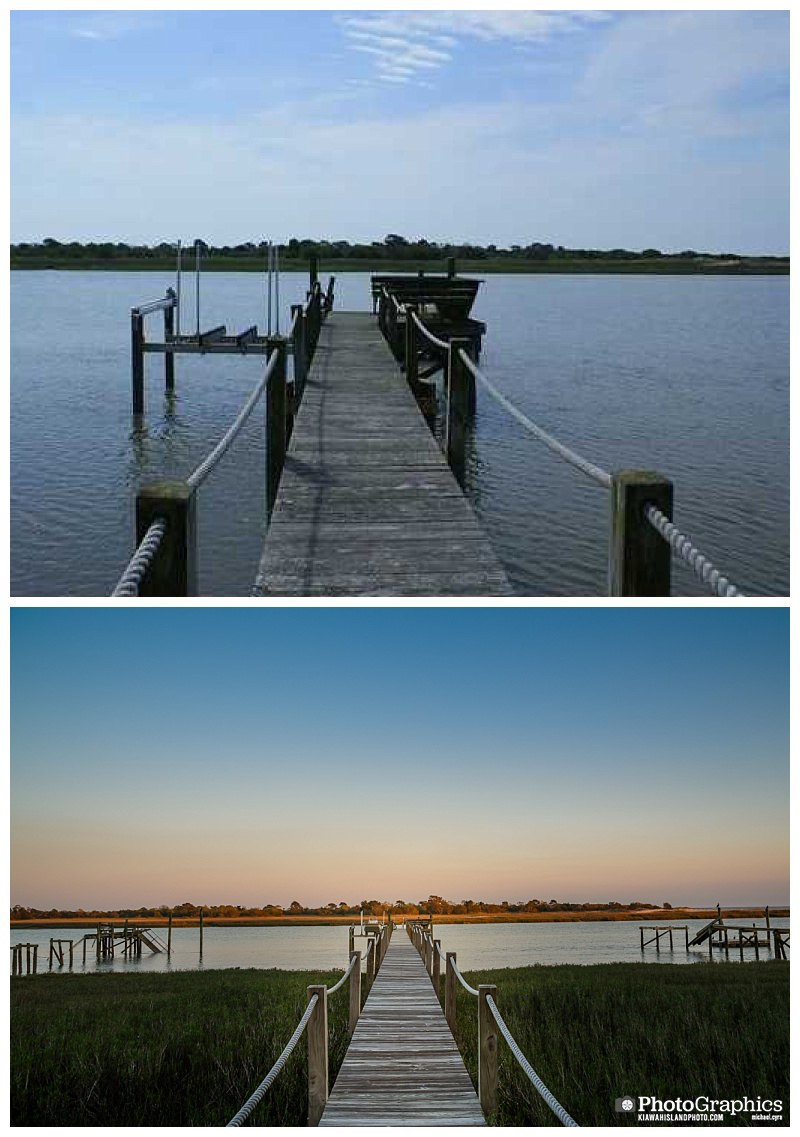
- We have worked hard to master the art of twilight photography. Here is a post all about it.
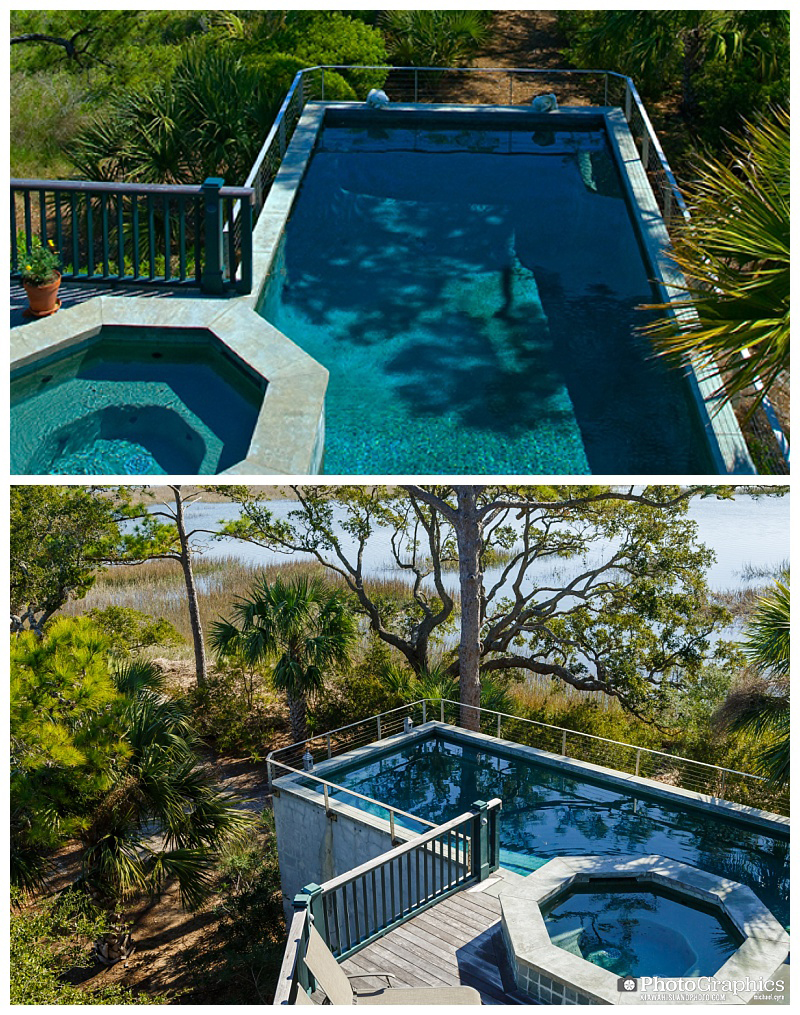
- Take photos at ground level and 20 foot level to achieve a unique areal perspective, especially if a home has a deck or pool.
For more information about real estate photography, or to schedule an appointment with us, contact us here.

I think it’s great that you mentioned how a home’s lighting can cause pictures to look dull unless the correct type of lighting is being utilized. My wife and I have been thinking about selling our fixer-upper home this summer, but we’re worried that the lack of windows in our basement might make it difficult for us to photograph the rooms since the lighting is especially dim. We’ll consider finding a professional that can help take beautiful photographs of our property.